Expensive camper vans are cool – they're filled with all sorts of features that make van life a lot more comfortable, even with some over-the-top ones like an incinerating toilet. However, as impressive as they are, I'm also a fan of homemade van builds that balance quality and price well. Today, I'm checking out one such project made by a young couple.
Meet Willy and Molly and their full-time tiny home on wheels, a 2019 Ford Transit Extended High-Roof. Willy has been traveling in camper vans since 2017 when he started living in a Ford Transit Connect. By the way, Transit Connects can be nice yet very tiny homes usually fit for a single person, even though I've written about couples living in them.
Anyways, Willy introduced Molly to the van life. It wasn't a perfect match at first, but she ended up wanting to try this lifestyle. So, the couple decided to purchase this van to transform it themselves. Part of the purpose of this article is to show you that with some creativity and determination, you can build a budget-friendly mobile home that will satisfy most of your needs and wants.
The Ford Transit is a popular base vehicle for camper van conversions. Why? Long story short, it's more affordable and has cheaper parts, but the Ram ProMaster is the "most square" option), it's tall and wide, and any mechanic will know how to work on it (compared to the Sprinter).
As usual, I'll be starting the tour with the rig's exterior. It's finished in run-of-the-mill white paint all around. You could almost call it "stealthy" were it not for the roof rack holding a sizeable awning – these definitely make you think someone might be living inside this vehicle.
Photo: YouTube Screenshot / Nate Murphy
There's not much else to talk about regarding the exterior besides a ladder attached to the van's driver's side. Truth be told, if you're interested in starting van life on a tighter budget, you don't really need fancy accessories, especially if your rig isn't designed to go deep off the beaten path.
The awning allows you to enjoy the space outside your van while being protected by weather elements. Moreover, the roof rack enables you to fit a deck, solar panels, extra storage spots, or any other essential features on the vehicle. This van's roof rack houses solar panels and traction boards.
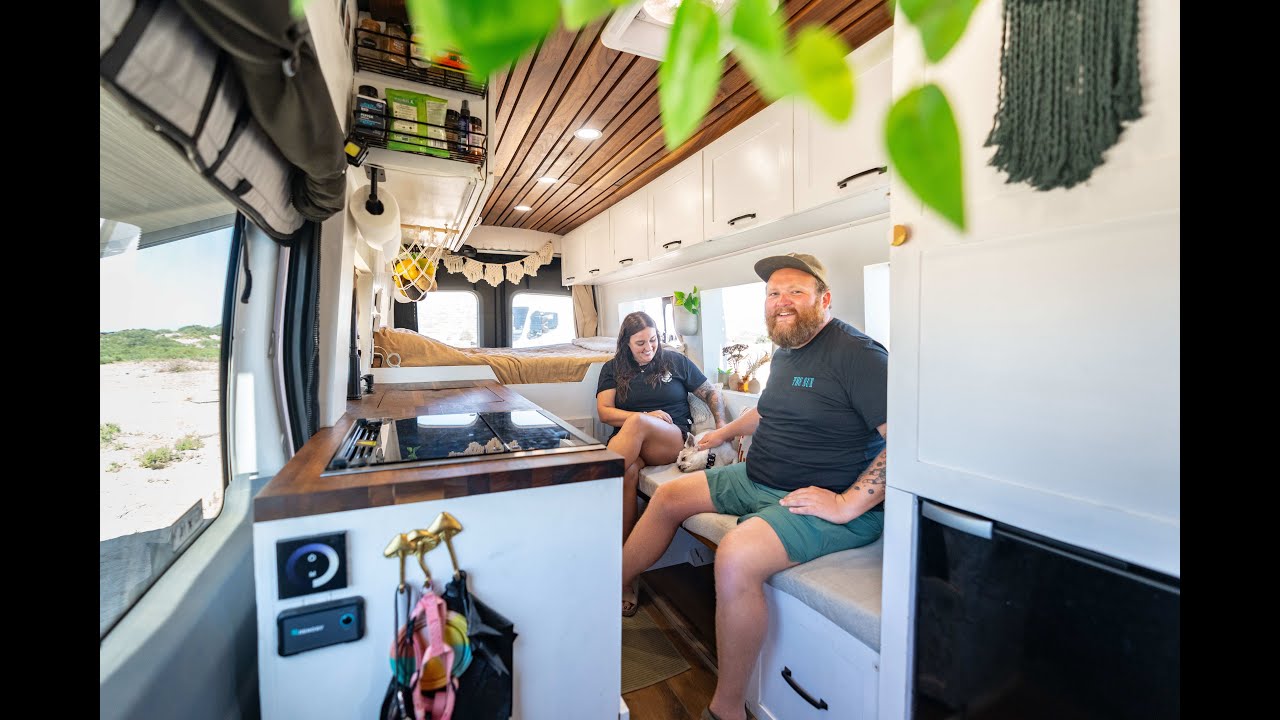
Enough about the exterior; let's go inside and see the most significant transformation of this Transit. Slide the main door open, and you'll be greeted by a simple, uncluttered yet aesthetically pleasing design. Willy and Molly opted for many white touches, including the cabinetry and walls, paired with walnut elements, like the countertops and slatted ceiling.
You'll notice an open layout in this van's interior. That means the driver's cabin isn't separated from the living space, making the interior feel roomier. What's more, the many windows on both sides of the van let plenty of natural light shine inside.
Photo: YouTube Screenshot / Nate Murphy
Willy explained that the foundation of their relationship was cooking. So, naturally, the couple wanted to have a proper kitchen in their mobile home. It's located on the passenger side and features a large countertop, a deep sink with a cover, an oven/three-burner stove combo, a large cabinet under the sink that houses a Trelino composting toilet, a rack, and an enormous overhead cabinet.
Behind the driver's seat, the couple devised a floor-to-ceiling unit integrating a small fridge/freezer, a hanging closet, and a shoe drawer. Furthermore, starting past this floor-to-ceiling unit, the top part of the driver's side of the van is occupied by overhead cabinets to the very rear.
Opposite the kitchen, you'll discover the seating area, consisting of two benches with a large table in the middle; both benches have storage spaces underneath. Moreover, like in many other camper vans, you can transform the seating area into an extra bed by lowering the table and rearranging the cushions.
The bedroom occupies the rear part of the interior. It boasts a queen-size bed and two drawers integrated into the bed frame. By the way, the bed is positioned higher up to leave enough room for the garage underneath.
Photo: YouTube Screenshot / Nate Murphy
Willy and Molly managed to fit a lot of stuff in the garage Besides all their personal items, this is where you'll find the rig's utilities. The plumbing system's on the right side, comprised of a 30-gallon (114-liter) freshwater tank and an outdoor shower.
A Renogy power system takes up the other side. Its highlights are 300 Ah batteries, a DC-DC charger enabling the system to charge from the vehicle's alternator, an inverter/charger, and a solar charge controller connected to the 400 W solar panels on the roof.
All in all, this couple kept things simple and built a great tiny home on wheels. It has a sharp look, a practical and well-equipped kitchen, and a comfortable layout with enough storage space. Unfortunately, we don't know how much this all cost to make, but I'm sure this project was budget-friendly.
Starting out with a motorcycle permit just because he could get one two years earlier than a driver's license, Mircea keeps his passion for bikes (motor or no motor) alive to this day. His lifelong dream is to build his own custom camper van. Full profile
Would you like AUTOEVOLUTION to send you notifications?