Old dogs know how to properly take care of their rides, but newer riders may be tempted to overdo a bit in certain directions. Even though some might say that washing a motorcycle is a very simple task (and it is), people make certain errors that may damage their vehicles.
While the present guide is not aiming to become some sort of bike-washing bible, we thought that a quick rundown of the most common mistakes and how to avoid damaging your ride would be a good, informative read. So, here we go!
Well, how about hardening, you might ask. Well, metal hardening procedures follow certain rules closely in terms of initial temperature, cool-down, and so on. Hardening or tempering metal parts is a science-based industrial process, unlike washing a bike. The reactions that take place during the hardening process have nothing to do with the most unscientific way you douse your hot engine in cold water.
In extreme cases engine blocks may crack, or their finish may suffer. The same goes for the hot pipes, and acting too hastily may damage the chrome, nickel coating.
DO wait a bit before you spray cold water on your bike. Several minutes won't make a big difference in your day's schedule, but they can help you stay out of trouble.
Make sure you have water supply and a hose, washing products, leather conditioners, clean cloth, the right brushes and the time you can devote to cleaning your machine.
If you are just looking forward to clean the thick layer of mud off your dirt bike, this can be done in several minutes, but if you feel like restoring your chromed-up cruiser as close as possible to its dealership condition, this will take more than half an hour, so make sure your agenda allows it.
DO take your time to check if you need anything before starting to clean your ride.
As cleaning a bike's chain is a really dirty job, it only makes sense that you do this before you get to clean the rest of the bike, doesn't it? Using special chain cleaning products and brushes has good odds of getting dirt occasionally sprayed on other parts, but once the chain is clean, it will be much easier to spot the areas that need extra attention from you.
DO use products specially designed for chain care, as traditional shampoos and similar household items just won't do. And DO use a hand-cleaning cream that will leave the tiniest crack in your skin squeaky clean. It's no use in washing a bike with grimy hands.
In case you didn't know already, between the metal links that make up a chain, the manufacturers have inserted special tiny rubber grommets. You've most likely heard about Z-rings, O-rings or X-rings. Well, these letters are inspired by how the cross-section of a grommet looks.
More important than their looks or names is what these rubber rings do. The chain bolts that keep links together are lubricated when the chain is assembled, and the rings help keep the grease inside the chain and the dirt outside.
When using a pressure washer, the high-power stream of water can penetrate the space between the rings and links fairly easily, pushing in dirt, grime and water and reducing the overall performance of the chain. As water can no longer escape from inside the chain as easily as it went in, the only chance is to evaporate when the chain becomes very hot after prolonged riding. Anyway, dirt, grime and water beyond the rubber ring barrier are bad for your chain's health and should be avoided.
DO read #3 for more on chains.
The same goes for the thick mud layer. Getting it all soaking wet will make it easier to remove and reduce the need to scrub excessively. The only thing that won't soak in water is the gunk that accumulates in certain areas, such as the front sprocket of chain-driven bikes, the rear wheel of the same two-wheelers and other spots where oil or fuel leaked and dust then became grime.
You can use a wide variety of cleaning products that have been formulated for this very job, and you'll be happy to have them around as we indicated it would be very cool at #2.
DO trust us when we say that most of them haven't been invented only to rip you off. A lot of people before you have grown bored having a hard time cleaning pesky types of dirt off their bikes. The demand for such products demand created them, and not sheer greed for money. And by all means, DO test more of them, you'll be surprised to learn that some work better than others in certain conditions.
Always use soft cloth to wash the bike and be prepared to add more cleaning solution and wait some extra minutes instead of scrubbing harder. Excessive pressure on an area WILL leave a mark, and depending on how harsh you were, it may, or it may not buff out.
Different shades of color and variable degrees of shine on chromed parts are some of the least desired effects of improperly cleaning a bike. They will make you feel less comfortable about your bike and WILL reduce the reselling value when you'll be in for getting a new motorcycle.
Repainting a piece of bodywork or re-chroming it is significantly more expensive than some of your time. No matter how hard you ride, being gentle when it comes to washing your bike always pays off.
DO read the time allocation paragraph in chapter #2 and be careful with the delicate finish of your bike.
As for the final DO this week, DO check back with us next week for the second and final part of this Dos and Don’ts of Washing a Motorcycle guide.
1. DON'T wash your bike when the engine or pipes are hot.
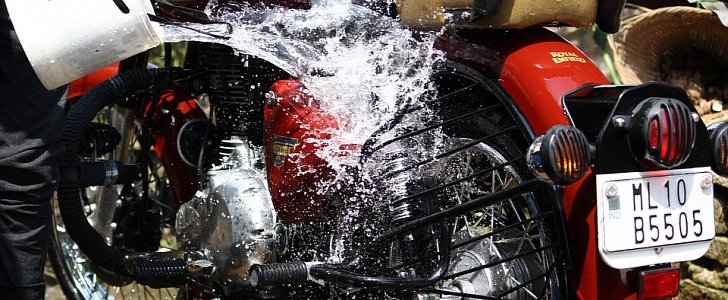
Hot metal and cold water aren't the best friends and spraying your bike with cold water right after you've ridden the hell out of it is not a very smart thing to do. Basic physics teaches us that when hot, metal parts expand, returning to the same dimensions as they cool down. Sudden temperature changes may damage metal parts or their finish and fixing this can be quite costly.Well, how about hardening, you might ask. Well, metal hardening procedures follow certain rules closely in terms of initial temperature, cool-down, and so on. Hardening or tempering metal parts is a science-based industrial process, unlike washing a bike. The reactions that take place during the hardening process have nothing to do with the most unscientific way you douse your hot engine in cold water.
In extreme cases engine blocks may crack, or their finish may suffer. The same goes for the hot pipes, and acting too hastily may damage the chrome, nickel coating.
DO wait a bit before you spray cold water on your bike. Several minutes won't make a big difference in your day's schedule, but they can help you stay out of trouble.
2. DON'T be unprepared if you're washing the bike yourself
Washing a bike is not rocket science, but like any other thing, one must be prepared for the task. It's way more comfortable to have everything you need at hand so you can get the job done in one step. Getting the things you need is not going to cost you a fortune, especially because you'll be using these objects more than once.Make sure you have water supply and a hose, washing products, leather conditioners, clean cloth, the right brushes and the time you can devote to cleaning your machine.
If you are just looking forward to clean the thick layer of mud off your dirt bike, this can be done in several minutes, but if you feel like restoring your chromed-up cruiser as close as possible to its dealership condition, this will take more than half an hour, so make sure your agenda allows it.
DO take your time to check if you need anything before starting to clean your ride.
3. DON'T forget to clean the chain before you actually clean the rest of the bike.
Motorcycles with a chain final drive come with the hassle of having to clean, lube and tighten it periodically. That is, if you don't fancy changing the chain and sprocket kit too often. If you're a filthy rich guy, you could even replace the chain instead of cleaning it, but this sounds more like dumb comedy territory.As cleaning a bike's chain is a really dirty job, it only makes sense that you do this before you get to clean the rest of the bike, doesn't it? Using special chain cleaning products and brushes has good odds of getting dirt occasionally sprayed on other parts, but once the chain is clean, it will be much easier to spot the areas that need extra attention from you.
DO use products specially designed for chain care, as traditional shampoos and similar household items just won't do. And DO use a hand-cleaning cream that will leave the tiniest crack in your skin squeaky clean. It's no use in washing a bike with grimy hands.
4. DON'T use the pressure washer to clean your chain
Even though taking care of a bike's chain might very well be a subject for another Moto How-To, we'll briefly get into this here, as well. Using a pressure washer to clean your bike's chain has excellent odds of actually ruining it.In case you didn't know already, between the metal links that make up a chain, the manufacturers have inserted special tiny rubber grommets. You've most likely heard about Z-rings, O-rings or X-rings. Well, these letters are inspired by how the cross-section of a grommet looks.
More important than their looks or names is what these rubber rings do. The chain bolts that keep links together are lubricated when the chain is assembled, and the rings help keep the grease inside the chain and the dirt outside.
When using a pressure washer, the high-power stream of water can penetrate the space between the rings and links fairly easily, pushing in dirt, grime and water and reducing the overall performance of the chain. As water can no longer escape from inside the chain as easily as it went in, the only chance is to evaporate when the chain becomes very hot after prolonged riding. Anyway, dirt, grime and water beyond the rubber ring barrier are bad for your chain's health and should be avoided.
DO read #3 for more on chains.
5. DON'T forget to soak.
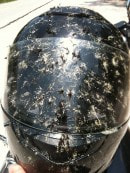
If you've been riding for a long time or have covered a great distance and feel like starting the next stage of your trip with a clean bike, allowing the dirt to soak is a good idea. This is especially helpful in getting rid of dead insects that found their shallow grave on the shiny surfaces of your bike. It's only tenfold easier if you use an insect-removal spray and let it soak a bit into this bug hecatomb than struggling to use a sponge and a lot of water.The same goes for the thick mud layer. Getting it all soaking wet will make it easier to remove and reduce the need to scrub excessively. The only thing that won't soak in water is the gunk that accumulates in certain areas, such as the front sprocket of chain-driven bikes, the rear wheel of the same two-wheelers and other spots where oil or fuel leaked and dust then became grime.
You can use a wide variety of cleaning products that have been formulated for this very job, and you'll be happy to have them around as we indicated it would be very cool at #2.
DO trust us when we say that most of them haven't been invented only to rip you off. A lot of people before you have grown bored having a hard time cleaning pesky types of dirt off their bikes. The demand for such products demand created them, and not sheer greed for money. And by all means, DO test more of them, you'll be surprised to learn that some work better than others in certain conditions.
6. DON'T scrub excessively.
If dirt doesn't go away after being soaked, treated with the right cleaner, it only needs more patience and not more force. Using abrasive cloth on your bike is a big no-no, as such materials are the shortest way to contemplating a new paint job.Always use soft cloth to wash the bike and be prepared to add more cleaning solution and wait some extra minutes instead of scrubbing harder. Excessive pressure on an area WILL leave a mark, and depending on how harsh you were, it may, or it may not buff out.
Different shades of color and variable degrees of shine on chromed parts are some of the least desired effects of improperly cleaning a bike. They will make you feel less comfortable about your bike and WILL reduce the reselling value when you'll be in for getting a new motorcycle.
Repainting a piece of bodywork or re-chroming it is significantly more expensive than some of your time. No matter how hard you ride, being gentle when it comes to washing your bike always pays off.
DO read the time allocation paragraph in chapter #2 and be careful with the delicate finish of your bike.
As for the final DO this week, DO check back with us next week for the second and final part of this Dos and Don’ts of Washing a Motorcycle guide.


