Parking sensors have become a must-have these days given the crowded cities we live in, but instead of paying hundreds of dollars to get them installed in your car, why not build your own at home?
This is what someone on reddit actually did as part of a basic application of Arduino, the cool cheap board that can be used to create all kinds of smart electronics that can then make their way to cars as well.
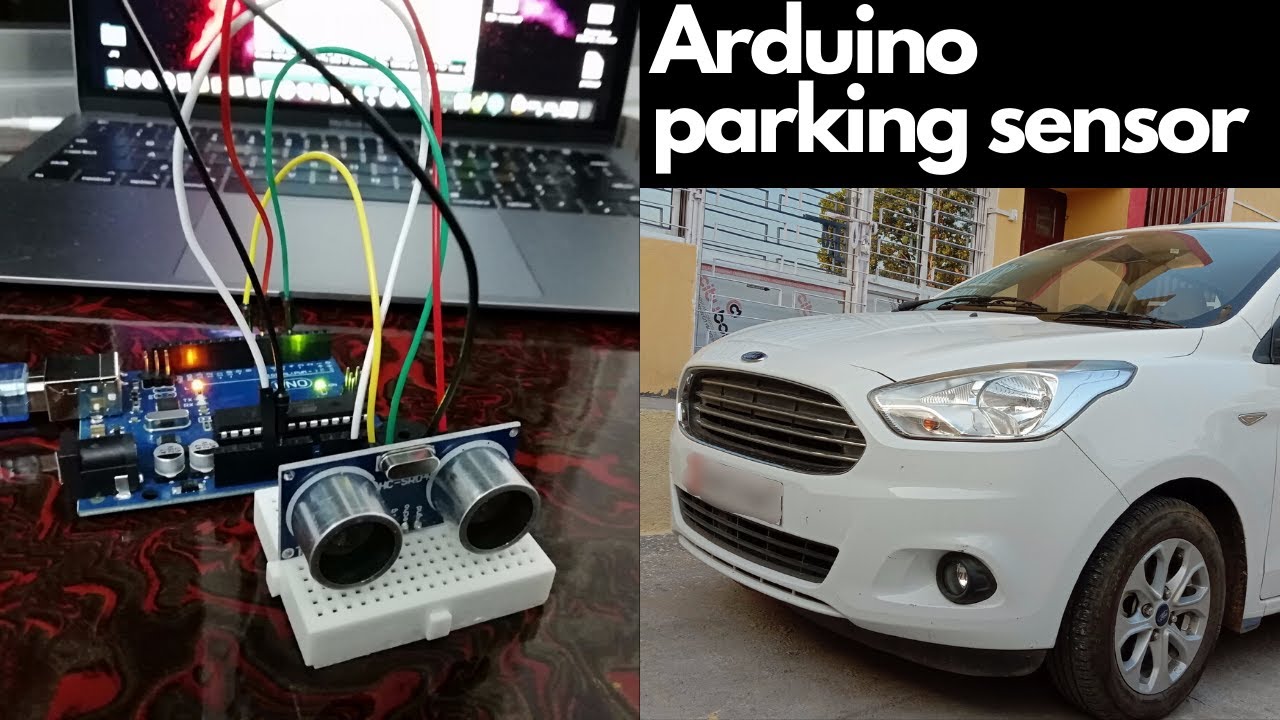
That’s right, these parking sensors are powered by an Arduino board, and the only extra components that were used in the project are a HC SR04 ultrasonic sensor, an active buzzer, and jumper wires.
It goes without saying that such an implementation is a lot cheaper than the parking sensors that you can buy online these days. The ultrasonic sensor, for example, can be found online for less than $5, while the buzzer doesn’t cost more than a couple of dollars.
On the other hand, it’s true that building such parking sensors at home using an Arduino is the kind of thing that everyone can do. But at the same time, with a little research and basic knowledge (and of course, by following the instructions you find online), you should be able to create such a basic application and then further improve it with more features on your own.
As the creator of this system explains, the parking sensors can measure the distance accurately with a maximum range of approximately 2 meters, which is more than enough when parking a car.
“The principle is simple: module obtains the distance and accordingly changes the frequency of the buzzer. As the object is closing in on the sensor, buzzer’s frequency is increasing. The frequency is [then] decreasing as the object moves away,” the project creator explains in the video (which you can also watch below).
So the whole thing works pretty much just like any regular parking sensor, only that it’s built at home using nothing more than cheap parts and an Arduino board.
Watch the video below to see the system in action and jump to 1:50 to see the circuit and code used for the Arduino.
Bogdan keeps an eye on how technology is taking over the car world. His long-term goals are buying an 18-wheeler because he needs more space for his kid’s toys, and convincing Google and Apple that Android Auto and CarPlay deserve at least as much attention as their phones. Full profile
Would you like AUTOEVOLUTION to send you notifications?