Parking sensors are very useful in many situations. Unfortunately, while some vehicles are fitted as standard with them, others are not. So, the only option is to buy a set and either install it yourself or have them mounted by a technician, so you can park in tighter spots.
These days, when many options are deleted by carmakers due to the lack of chips, some cars are coming without parking sensors. Also, you might buy a second-hand vehicle that doesn't have those installed. Then, of course, you might get used to it and become the parking champion of your neighborhood. But what if you don't want to go through all that hassle and just go for the modern way and install a set of aftermarket parking sensors by yourself? In that case, you should continue reading this.
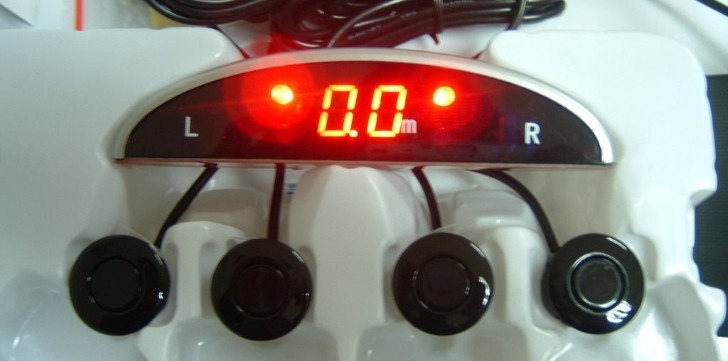
After you've decided what to buy, you need a garage to work on the car. If you have one of your own, that's fine. If not, don't cheap out; buy a six-pack of beer for a friend and go there. Or you might rent one for a day. Also, you'll need some power tools, so an electric outlet is mandatory. Hopefully, you didn't fall for the cheapest kit with just two sensors. A good set will get you four of that, a display monitor, a hole saw drill, a control box, and cables.
The control box emits sounds either through the car's sound system or via a dedicated one that comes with the parking sensors kit. At first, there will be just intermittent beeps. As the distance to objects is smaller, those beeps become more frequent. Then, those beeps are transformed into a continuous buzz. At the same time, on display, there are a number of bars. When all of them are lit, the driver should stop or advance at their own risk of scratching the bumper.
If your car doesn't have those strips, you must mount them directly on the bumper. First of all, wash, clean, and dry the bumper. Then, apply duct tape around the area to avoid scratches. Last, but not least, check behind the bumper to see if there is room for the parking sensors. Some bumpers cover shock-absorbing foams, and you can't drill into those. In addition, you need some room for wires.
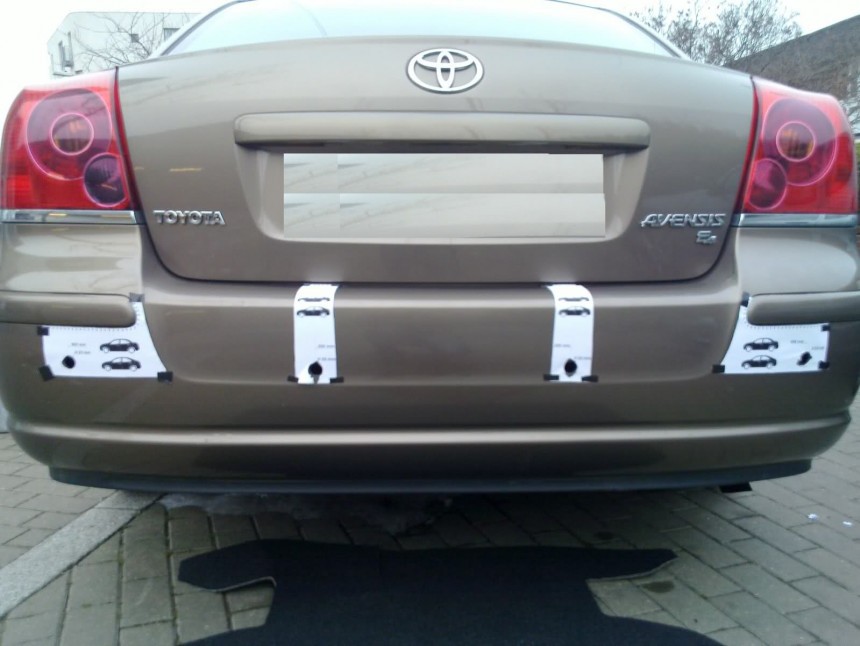
Using a marker, you'll have to draw the points where you'll drill the holes for the sensors. The ideal height where these should be mounted is about 21 inches (55 cm) from the ground level. Of course, they also have to be mounted parallel to the ground (or perpendicularly on the bumper), so their effectiveness will be maximum.
Begin by measuring the length of the bumper from side to side. Use duct tape to mark the center. From that point, draw the first two sensors' locations 7 to 10 inches (20-25 cm) to the left and right. Add another 15-17 inches (40-45 cm) to the outer side from these two sensors for the last two. Also, you might measure the bumper's length and distribute the sensors equally from side to side, with the outer ones placed as close to the corners as possible. Mark the spots with the sharpie.
Perform an installation check before starting to drill any hole. If they are not working for some reason, now would be the right time to check and fix any problems. First, you need to connect the wire to the reversing light bulb. Next, connect the ground wire to the car's metal bodywork or chassis. Wire all the connections and test the sensors by turning on the car and putting it in reverse. You should hear the system buzzing or beeping.
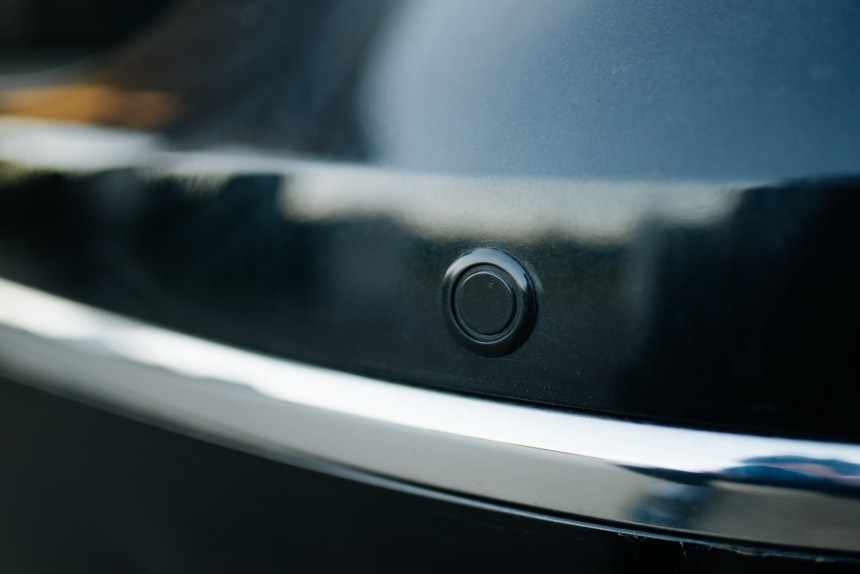
Now, it's time to use the drill and make the holes. After you finish, dust them off from any debris and gently push the sensors inside. They have some clips that secure them into position. When they are all the way in, you should hear a click. After all four are mounted on the bumper, connect them from underneath.
After all the wires are installed, secure them with duct tape or plastic tie straps. Get the wires inside the vehicle and conceal them under the carpet so no one will trip on them when getting in or outside the car. Stick the display with double-sided tape in a visible, convenient area. Some are made to be affixed above or under the rearview mirror.
Now, you're all set! You may test them again to see if they're working as supposed. I would recommend you go slowly in reverse until you hear the continuous buzz. Then, stop the car, get out, and see exactly how far the car is to the nearest obstacle. Sometimes, these aftermarket beepers are very good and sound the annoying alarm when they are a few inches away. However, other times, they are too cautious and buzz from three feet (one meter away). But still, always check your surrounding when parking.
Here's what you need
For starters, you have to set your budget. Like most other things, what's cheap might not be worth it, and the good stuff is, most of the time, expensive. For example, you may find cheap aftermarket parking sensor kits on eBay starting from as little as $25 (EUR 23.75). At the same time, others are going above 150 USD (142.5 Euro) with sophisticated systems that include a camera and a rearview mirror with an incorporated display. At the same time, original parking sensors might set you back a few hundred dollars, while a reversing camera can go above 1000 USD. And, in some cases, it's not even possible to retrofit parking sensors on an already-built vehicle.After you've decided what to buy, you need a garage to work on the car. If you have one of your own, that's fine. If not, don't cheap out; buy a six-pack of beer for a friend and go there. Or you might rent one for a day. Also, you'll need some power tools, so an electric outlet is mandatory. Hopefully, you didn't fall for the cheapest kit with just two sensors. A good set will get you four of that, a display monitor, a hole saw drill, a control box, and cables.
How does it work?
The entire kit is activated when you're switching to reverse. Then, the reversing lights are lit and send a signal to the control box. The module sends ultrasonic wave sounds through the sensors, which are reflected back by the nearby obstacles. The system automatically calculates how fast the waves are bounced back and "knows" the remaining distance. The waves return faster as you go closer to those objects (cars, walls, etc.).The control box emits sounds either through the car's sound system or via a dedicated one that comes with the parking sensors kit. At first, there will be just intermittent beeps. As the distance to objects is smaller, those beeps become more frequent. Then, those beeps are transformed into a continuous buzz. At the same time, on display, there are a number of bars. When all of them are lit, the driver should stop or advance at their own risk of scratching the bumper.
How to install parking sensors
For starters, you should know that the rear bumper is the best place to mount the sensors. That part is the first that touches other obstacles, and that's why automakers install them there, so you should do the same. Sometimes, carmakers use the same strips for all vehicles, with or without parking guidance, and those elements show where to mount the sensors. Drill there.If your car doesn't have those strips, you must mount them directly on the bumper. First of all, wash, clean, and dry the bumper. Then, apply duct tape around the area to avoid scratches. Last, but not least, check behind the bumper to see if there is room for the parking sensors. Some bumpers cover shock-absorbing foams, and you can't drill into those. In addition, you need some room for wires.
Using a marker, you'll have to draw the points where you'll drill the holes for the sensors. The ideal height where these should be mounted is about 21 inches (55 cm) from the ground level. Of course, they also have to be mounted parallel to the ground (or perpendicularly on the bumper), so their effectiveness will be maximum.
Perform an installation check before starting to drill any hole. If they are not working for some reason, now would be the right time to check and fix any problems. First, you need to connect the wire to the reversing light bulb. Next, connect the ground wire to the car's metal bodywork or chassis. Wire all the connections and test the sensors by turning on the car and putting it in reverse. You should hear the system buzzing or beeping.
Now, it's time to use the drill and make the holes. After you finish, dust them off from any debris and gently push the sensors inside. They have some clips that secure them into position. When they are all the way in, you should hear a click. After all four are mounted on the bumper, connect them from underneath.
After all the wires are installed, secure them with duct tape or plastic tie straps. Get the wires inside the vehicle and conceal them under the carpet so no one will trip on them when getting in or outside the car. Stick the display with double-sided tape in a visible, convenient area. Some are made to be affixed above or under the rearview mirror.
Matching-color parking sensors
While some suppliers are delivering the parking sensors in the color you ask for, others are just black or primed to get painted. You may paint them after you mount them on the car; also, that is not highly recommended. You have to slide a piece of paper under the sensors' edges and cover the rest of the bumper around them. Use a fine coating of paint from the spray can. If the layer is too thin, your sensors will be visible. If it's too thick, they won't accurately read the distances to obstacles.Now, you're all set! You may test them again to see if they're working as supposed. I would recommend you go slowly in reverse until you hear the continuous buzz. Then, stop the car, get out, and see exactly how far the car is to the nearest obstacle. Sometimes, these aftermarket beepers are very good and sound the annoying alarm when they are a few inches away. However, other times, they are too cautious and buzz from three feet (one meter away). But still, always check your surrounding when parking.


